
Ready to elevate your application to new heights?
If you are here, it means you have successfully set up your Dance Master Pro application as outlined on the Basic Configuration page.
This section covers the primary topic in detail
- Dashboard and reporting
- Attendance tracking
- Online payment setup
- Invoice / Receipt management
- Customer portal
- Choreography management
- Library management
Dashboard and reporting
When you log into the application, the first screen you see is the Dashboard. This screen helps you quickly understand your progress. The Dashboard is divided into 7 sections.
Overview of Financial Results
Revenues: Total revenues collected year-to-date, compared to the previous year. This metric helps you understand how your current sales performance measures up against last year.
Costs: Revenues: Year-to-date total costs compared to the previous year. This metric helps you evaluate how your current expenses compare to those from last year.
Net Profit: This is the revenue minus costs. It helps you understand how much money you are earning.

Period base
The entire dashboard can display data based on either the fiscal year or the academic year. Typically, the fiscal year runs from January 1st to December 31st, while the academic year spans from September 1st to August 31st. You can customize and define both periods in Settings > General Settings. Once selected, the dashboard will update accordingly to reflect data for the chosen timeframe, allowing you to monitor the period that matters most to you.
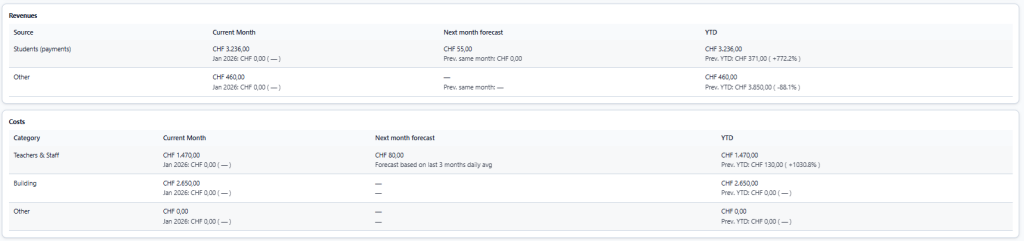
REVENUES
In this section, you can monitor all revenues from Students and Others, divided into Current Month and Next Month estimates, including a comparison to the Previous Year.
COSTS
In this section, you can monitor costs sourced by Staff, Building, and Others, divided into current and next month forecasts, including a comparison to the previous year.
ACTIVE STUDENTS
For each active location, you can monitor the number of active students, those with expired medical certificates, and those with expired association cards. Clicking on any of these numbers will instantly take you to the corresponding student list.

EXTRA KPI
In this section, you can track key performance indicators (KPIs) such as:
- Attendance rate: the percentage of students who attend your lessons (calculated only when using the attendance module)
- Revenue per active student: average spending of a typical student
- Instructor cost percentage: how your staff expenses influence your overall costs
- Building cost percentage: how your building expenses influence your overall costs
- Active students without enrollments: This shows if there are any active students in your database who are not currently enrolled in any courses. Click the number to view the list.

CORSI
In this section, you can track the performance of your courses and see how they contribute to your growth.
- Enrollments: The total number of students enrolled in the course.
- YTD Revenue: The total revenue generated from the course to date
- YTD Cost: The total expenses incurred for the course to date
- YTD Profit: The cumulative profit generated by the course to date
- Attendance %: The percentage of course attendance (applicable only when the attendance tracking module is enabled)

Attendance Tracking
This module enables your staff to track every lesson directly within the calendar.
As the first step, create a new user type called Instructor. Please refer to this link for guidance. Once the Instructor is properly set up, they can log in to the platform and access the attendance tracking module by navigating to Courses > Attendance.
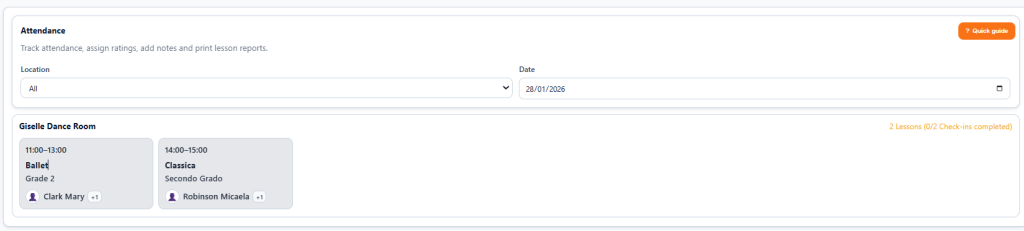
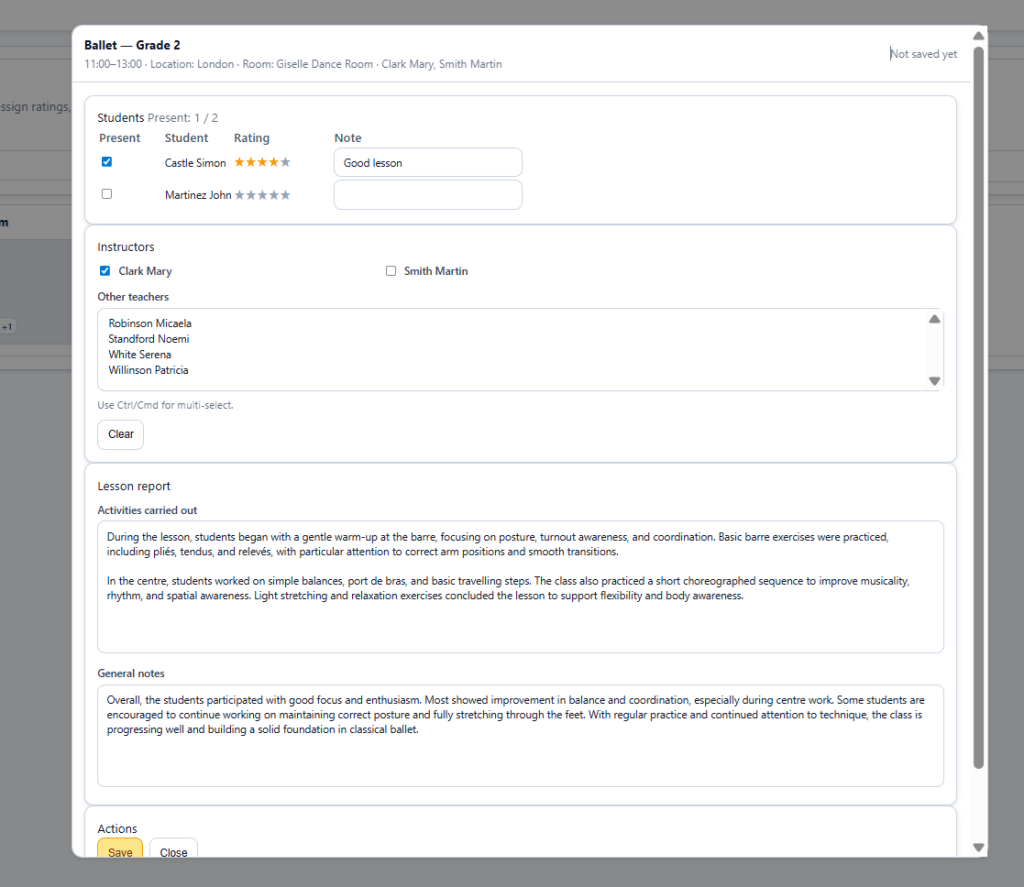
Select a course to access the tracking page. Here, you can monitor instructor attendance, track students, set rates, add notes, and include detailed information about the lesson. Once saved, you can generate a PDF report and/or print it for teacher signatures.
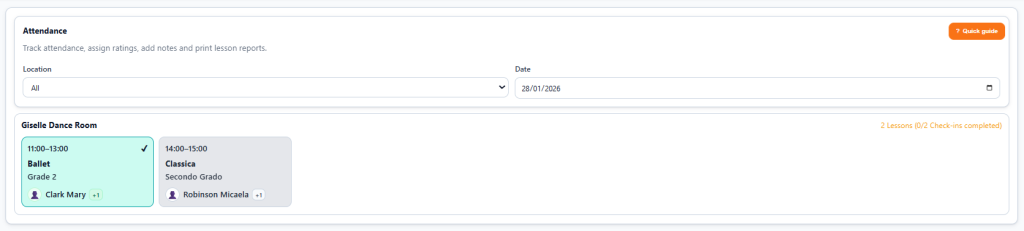
On the attendance page, you can view the newly saved report.
Online Payment Setup
This module enables your academy to accept online payments via Stripe. Follow these steps to integrate Stripe with Dance Master Pro.
- Create an account on https://stripe.com/
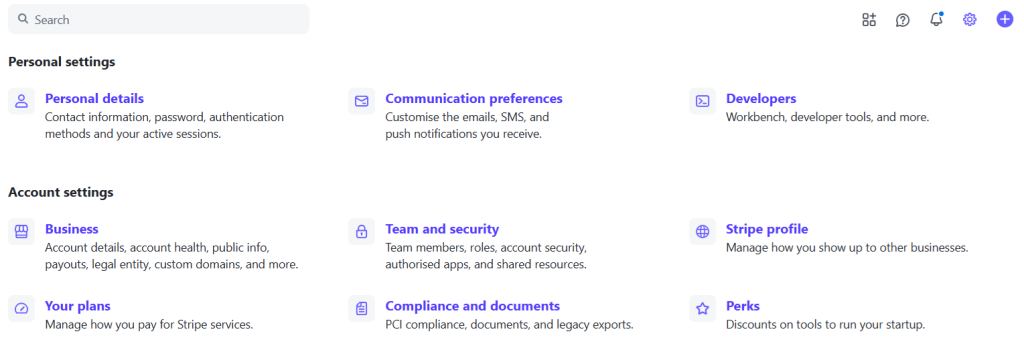
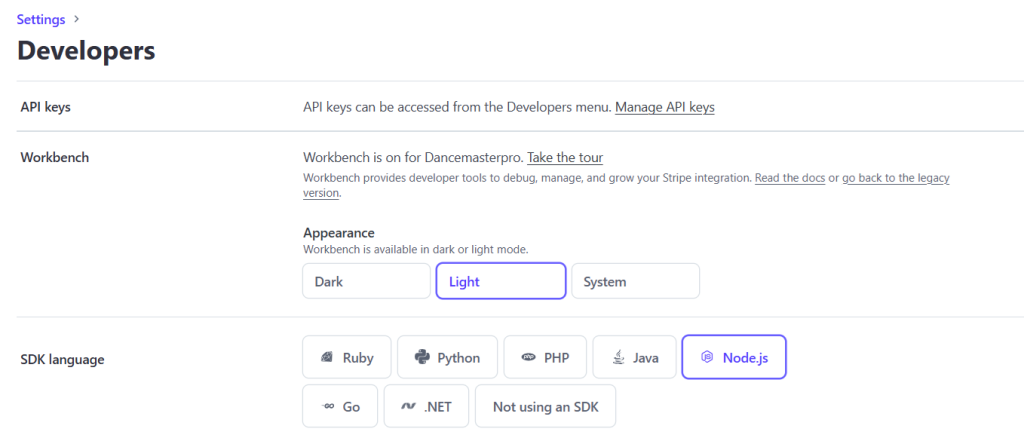
- Go to Settings – Developer
- Access to Manage API Keys in API Keys
- Copy Publishable key and Secret key
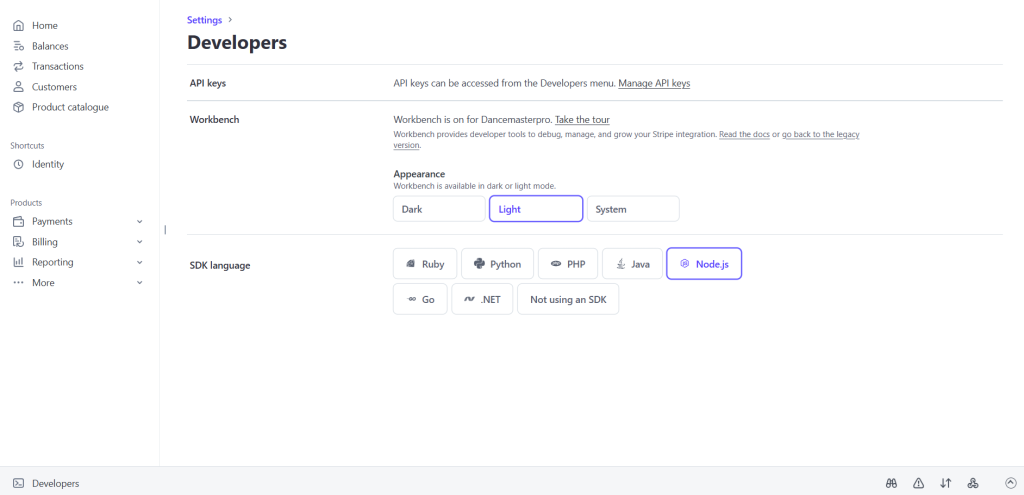
- Now go back to Settings – Developers and click on Developers footer bar
- Now go back to Settinhs – Developers and click on Developers footer bar and select Webhooks
- Select + Add destionation
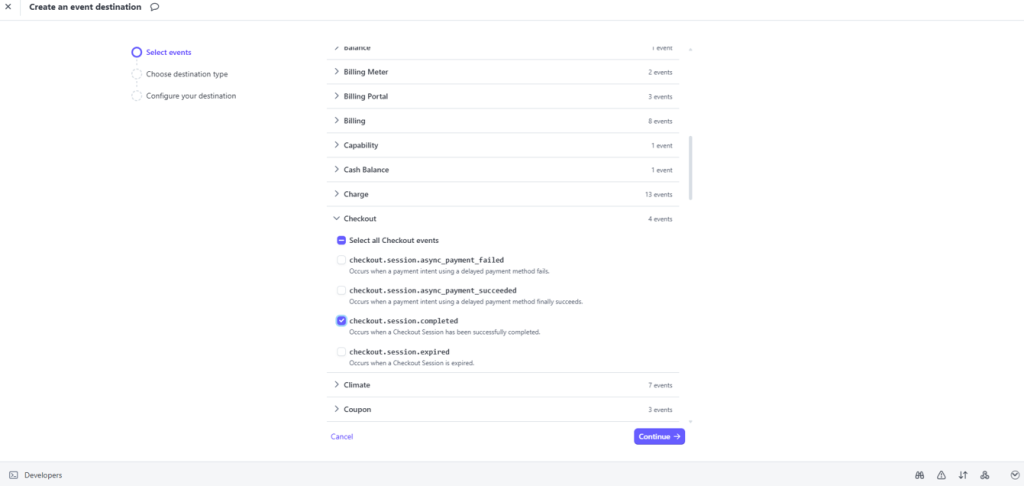
- In Checkout section select checkout.session.completed
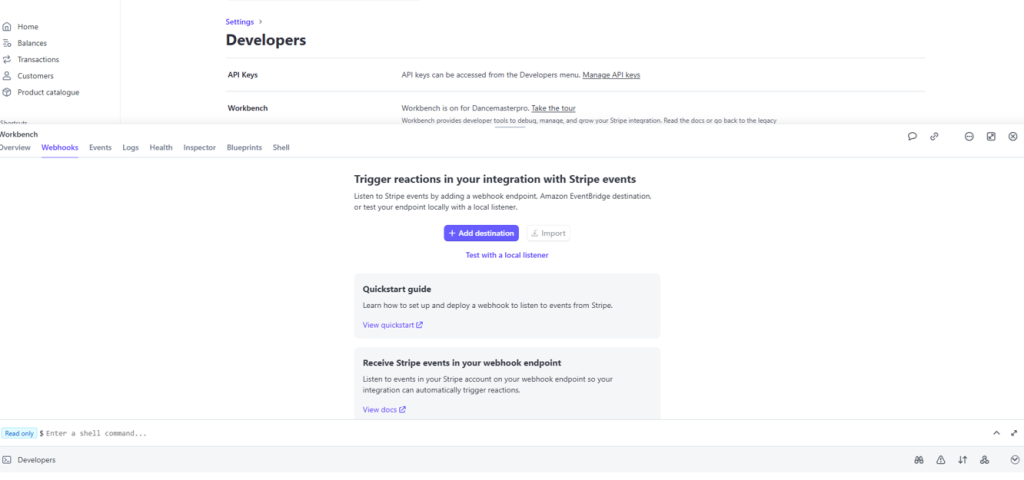
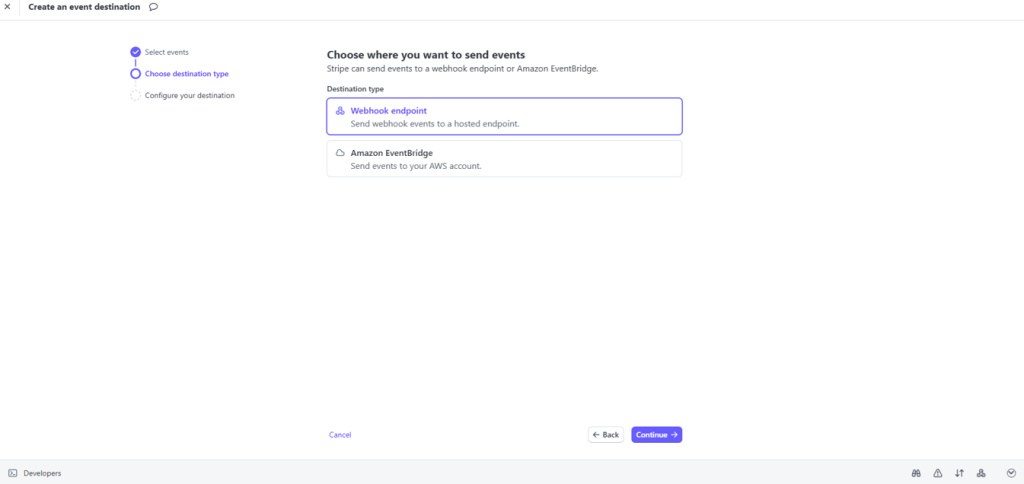
- In Destination Type select Webhook endpoint
- Insert in Destinaton name: Dance Master Pro
- Insert Endpoint URL: https://customers.dancemasterpro.com/stripe/webhook
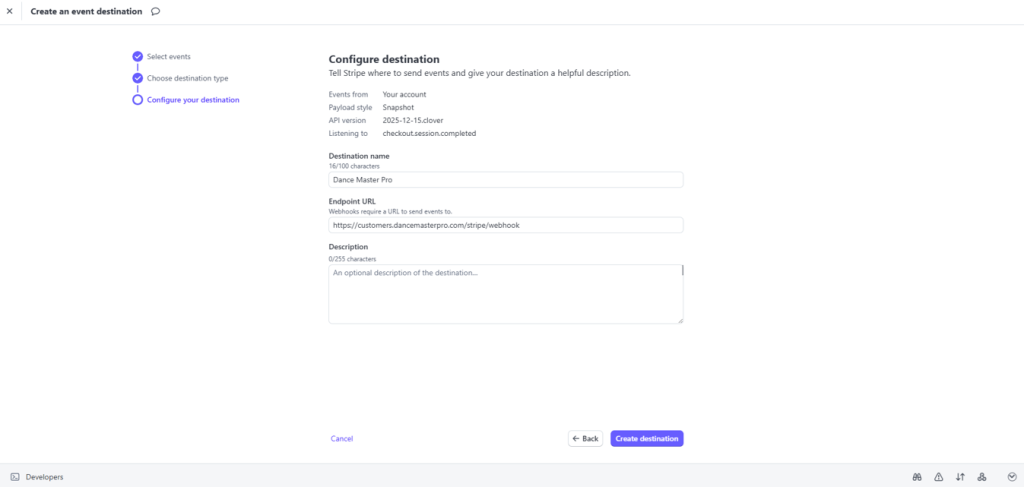
- Now copy the Signing key
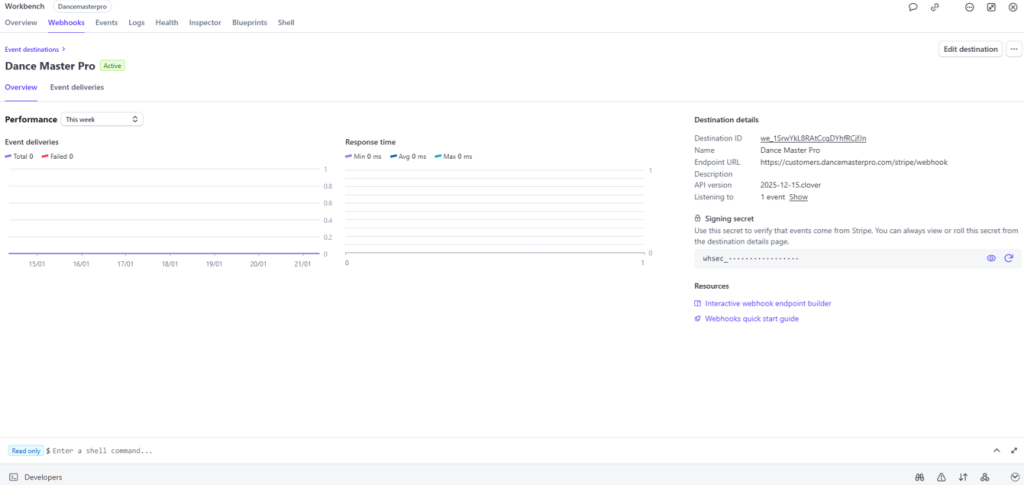
- Now go into your Dance Master Pro application and setup all the keys in the application
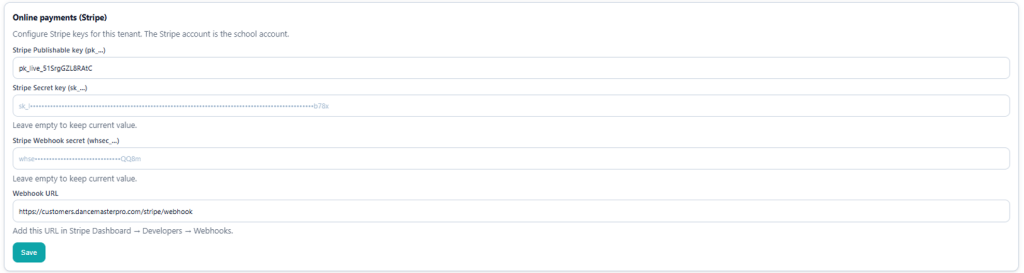
Stripe Publishable key : Copied from Stripe Account
Stripe Secret key (sk_…) : Copied from Stripe Account
Stripe Webhook secret (whsec_…) : Copied from Stripe Account
Webhook URL : https://customers.dancemasterpro.com/stripe/webhook
Invoice / Receipt management
This module creates a PDF from a template and saves it in a cloud repository. Each invoice or receipt has a unique auto-generated number. PDFs are stored on your cloud provider: Google Drive, Dropbox, or OneDrive. Let’s see how to set it up properly.
Setup invoice template
Navigate to Settings – Invoice Management. Here, you can customize the invoice number format under Invoice Number Format. Then, click on Open Invoice Template Editor. Please manage this section only if you have basic HTML knowledge. For custom documents, contact us with your template, and we’ll assist you with the HTML creation.
Setup invoice repository – Google Drive
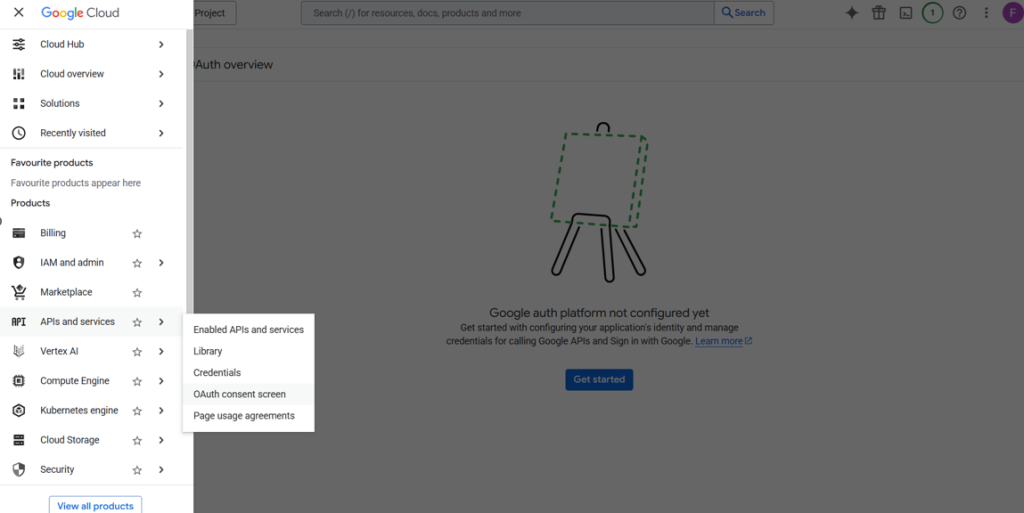
Access the Google Cloud Console at https://console.cloud.google.com/
Click on the left navigation bar and go to Products > APIs and Services > OAuth consent screen
In the new screen press on Create New Project named Dance Master Pro PDF Folder
Then begin creating a new app
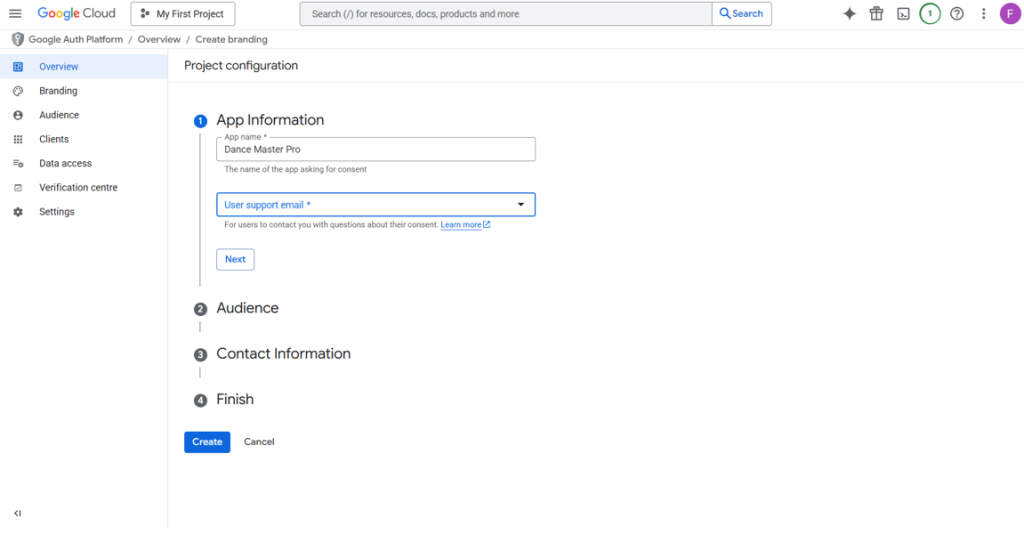
Define:
App Information – App Name = Dance Master Pro
App Information – User support email = select your mailbox
Press Next
Now define External as Audience
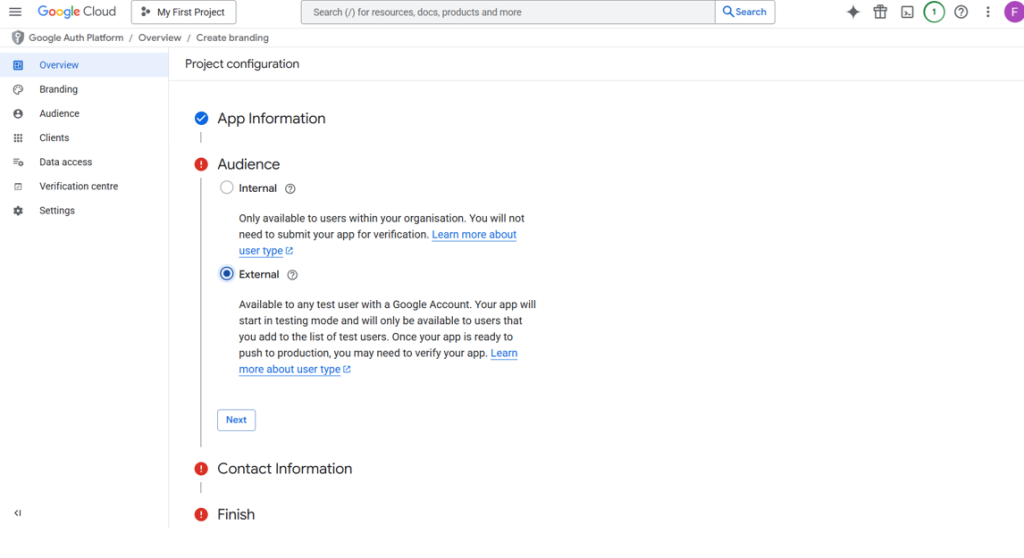
Complete Contact Information with your mail address and Finish.
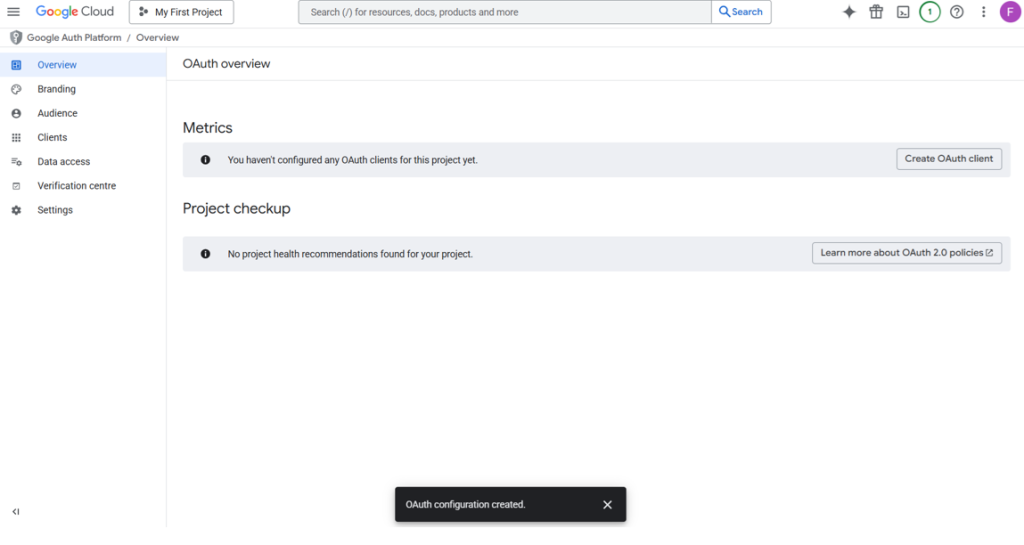
You will arrive at this screen.
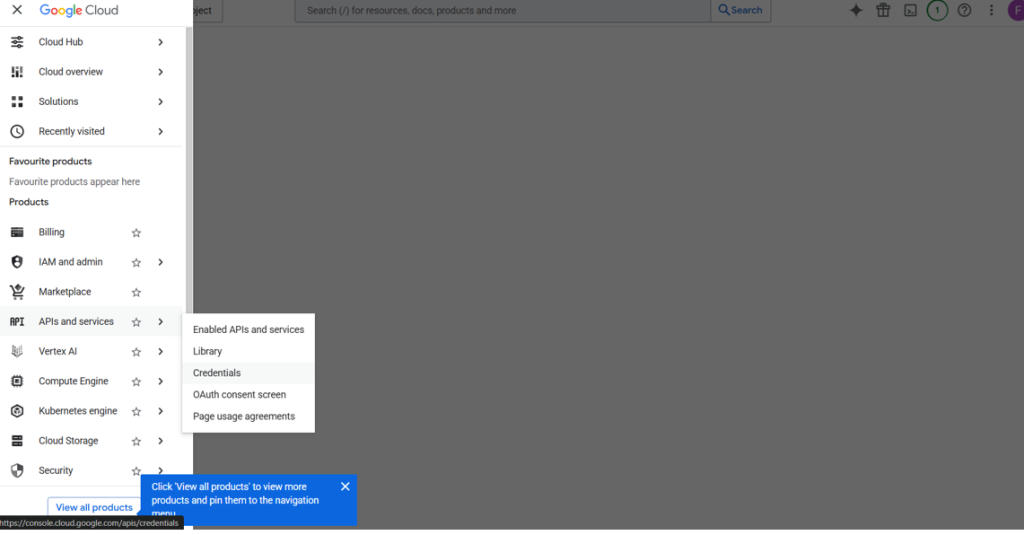
Now navigate to Products > APIs & Services > Credentials
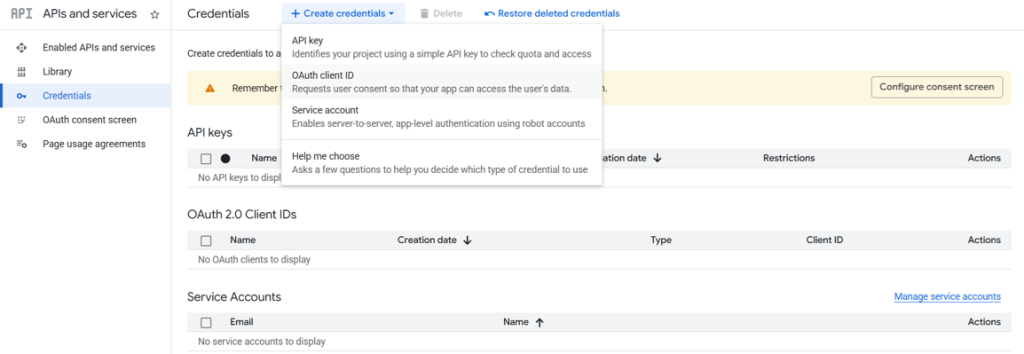
Click on + Create credentials > OAuth client ID
Define as follow
Type : Web Application
Name : Dance Master Pro
Authorised JavaScript origins : https://academy.dancemasterpro.com
Authorised redirect URIs : https://academy.dancemasterpro.com/settings?action=gdrive_cb
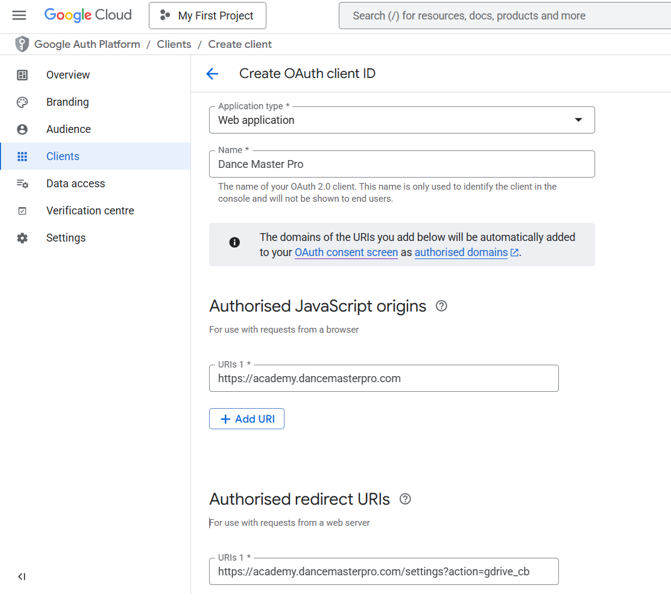
Copy on your notes following parameters Client id and Client secret
Now navigate in Google Auth Platform > Audience
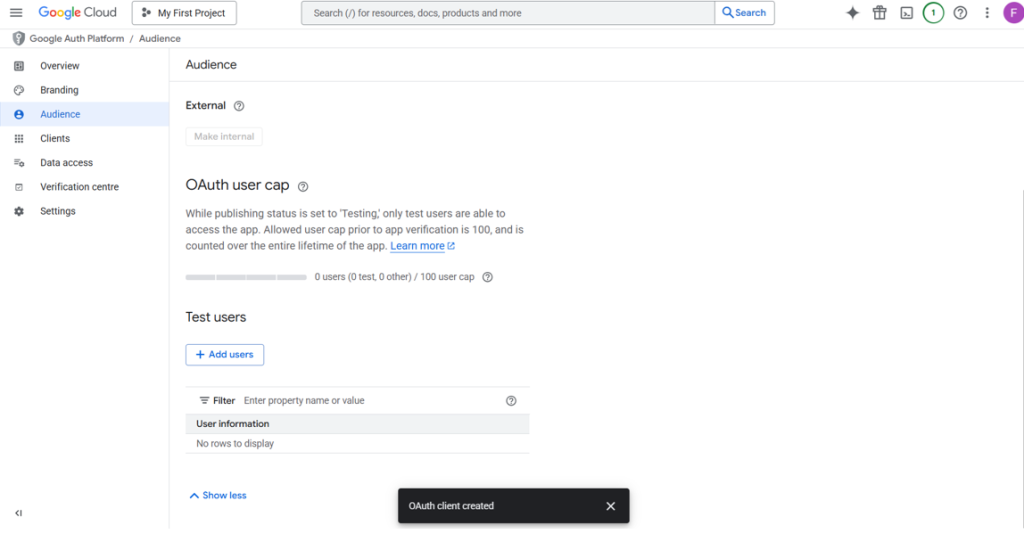
Click on Add users and insert your mail address.
Now, it’s time create the destination folder on Google Drive.
Access to Google Drive https://drive.google.com
Create a new folder named “Dance Master Pro – Invoices” and copy the link

Return to https://console.cloud.google.com/ and search for “Google Drive API” in the search bar under APIs & Services > API Library > Browse.
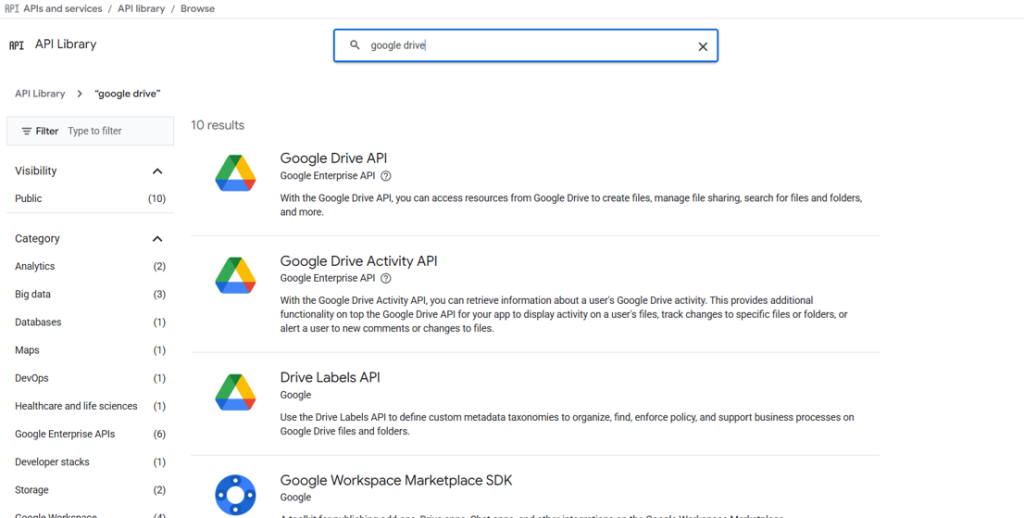
Then click on “Enable” and then access to setup page.
Now as final step go to academy.dancemasterpro.com in Settings page.
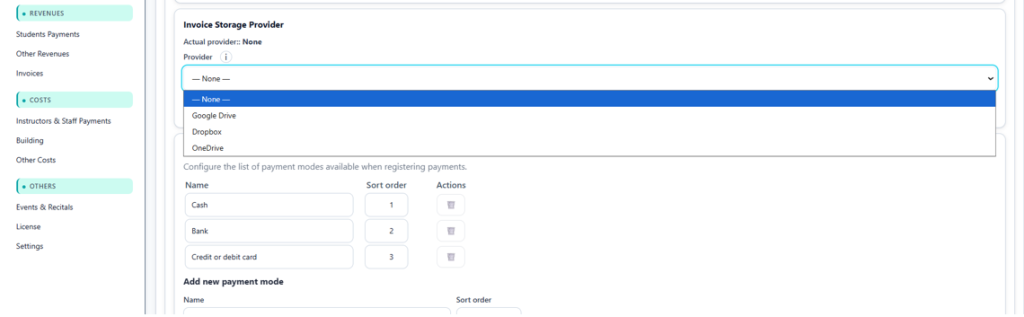
In the section Invoice Storage Provider select Google Drive.
Now complete following fields:
Client ID: Please enter the previously noted Client ID
Client Secret : Please enter the previously noted Secret ID
Folder ID / Link: Please provide the Google Drive folder link
Now click on Save.
It’s time to test it.
Click on Connect Google, and you will be redirected to the Google Sign-In page.
Once you log in, a pop-up message will appear: “OK! Refresh token saved.”
Now click on Test connection.
If the upload is successful, you will see a message like Upload completed to – You can access the destination folder here: https://drive.google.com/drive/folders/1U0nlDRkgQw…..eZ?usp=drive_link
To double-check you can go into your Google Drive and folder and you will find a PDF test file named DMP_TEST_date_time.pdf.
You can now generate receipts and invoices directly from Dance Master Pro and save the PDF files to your Google Drive.
Setup invoice repository – Dropbox
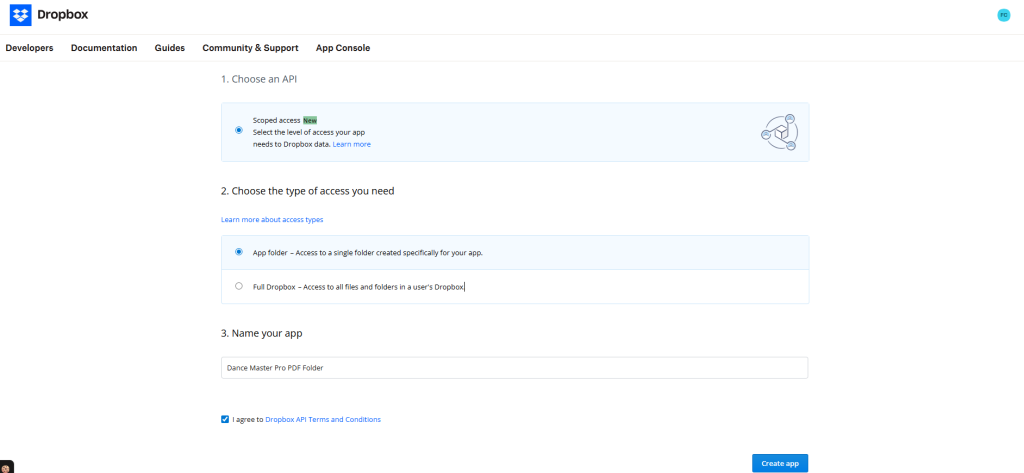
Visit https://www.dropbox.com/developers and sign up for an account.
You have have a page similar to this:
Click on Create Apps and select App Folder under Choose the type of access you need
Now activate the Permission type and configure it as shown in the following image
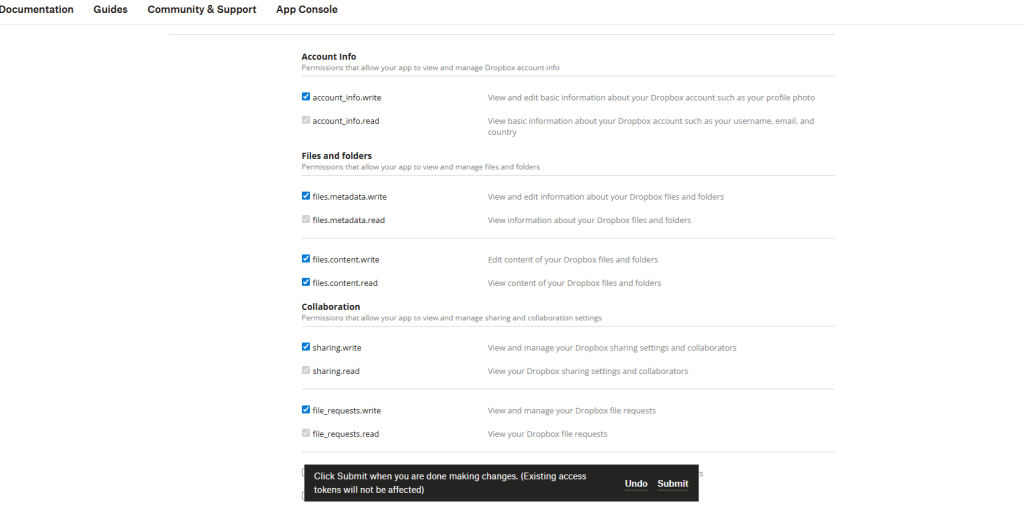
Then press on Submit.
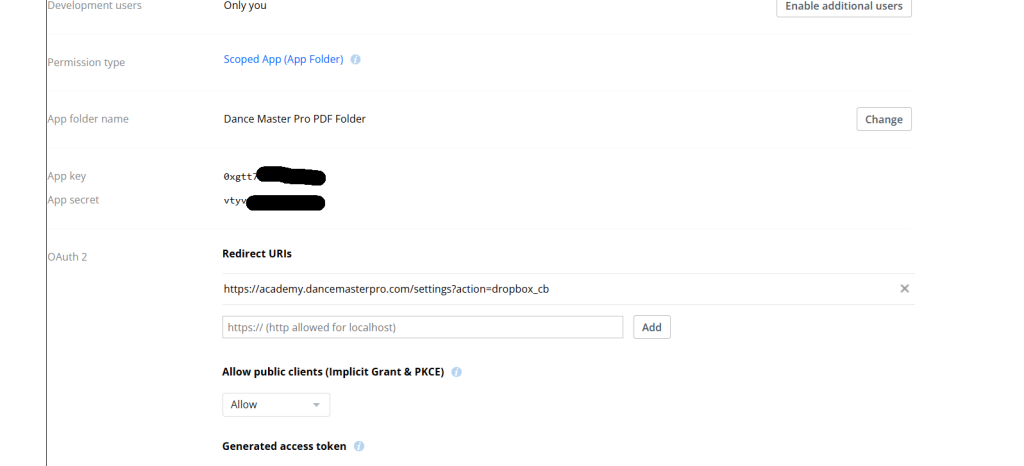
Now annotate following keys:
- App key
- App secret
and setup Redirect URIs with this address
https://academy.dancemasterpro.com/settings?action=dropbox_cb
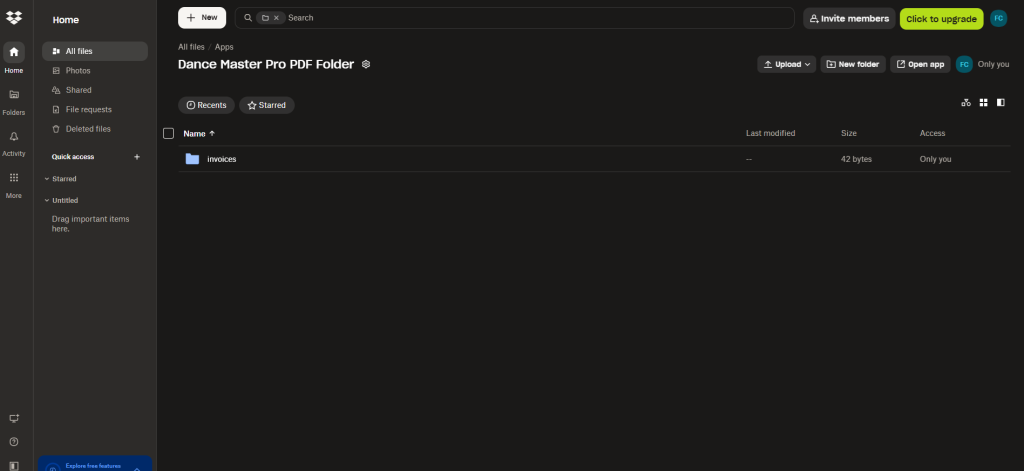
Go to https://www.dropbox.com/home and locate the new folder named Apps – Dance Master Pro PDF Folder. Open the Dance Master Pro PDF Folder and create a new folder called “invoices“.
Visit academy.dancemasterpro.com, navigate to Settings, and set up the Invoice Storage Provider as instructed.
Provider : Dropbox
App key : Paste the key
App secret : Paste the key
Folder Path: /invoices
Then press Save button and Connect Dropbox.
If the connection is successful, you will see the message “Dropbox connected. Refresh token saved.” and the Refresh token field will be populated automatically.
The final test can be performed by clicking the Test Connection button.
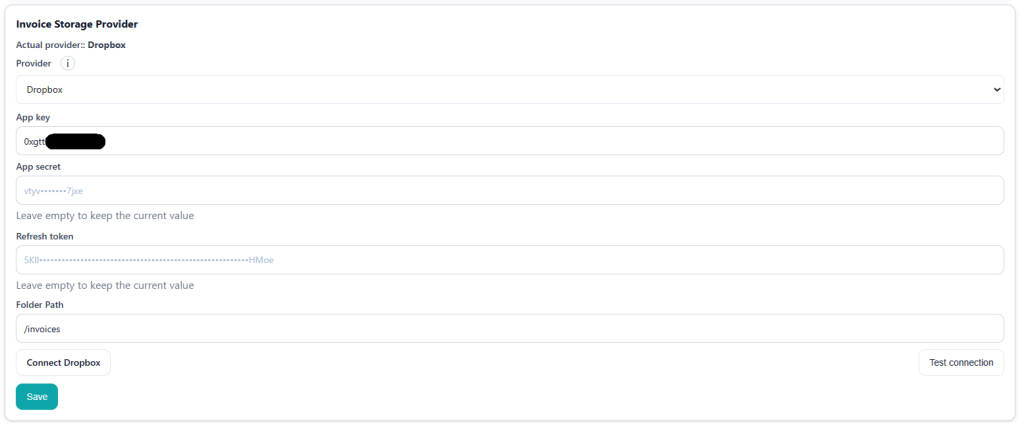
If everything goes smoothly, you will see the message “Upload completed to – You can open the destination folder here: /invoices” and in the remote folder, a test PDF named DMP_TEST_date_time.pdf will appear.
You can now generate receipts and invoices directly from Dance Master Pro and save the PDF files to your Dropbox.
FAQ?
Here, you’ll discover clear answers to common questions about using Dance Master Pro, helping you navigate the app with ease.
How do I register a new student in the app?
Simply go to the Students tab and click ‘Add New’ to enter student details and save.
Can I send a reminder to a student about missing payment?
Yes, go to Student, select the student, and click on Details. Here, you will see an overview of the student’s information and can send the summary to the student via email by clicking Send Summary to Student.
How do I track payments from students?
Use the Payments feature to monitor transactions. If can also enable Stripe integration to collect payment via online by customer web portal.
I have lost my credentials. How can I recover my account?
Simple. On the login page, click the “Password Lost” link and follow the instructions to receive a password reset email.
The season is ended. How can I start a new season?
Go to Settings and scroll down until you find the Season Reset button. Please read the instructions and warnings carefully before proceeding.